Good Morning Sunshine! Yeah, I’m talkin’ to you.
Last week I shared the Pretty Little Pancake party I put together for a couple friends and promised to show you how I made the DIY napkins and wall hanging that made an appearance. So here you have it, quick and ever so affordable napkins (and then I’ll squeeze in how I did that little wall hanging).

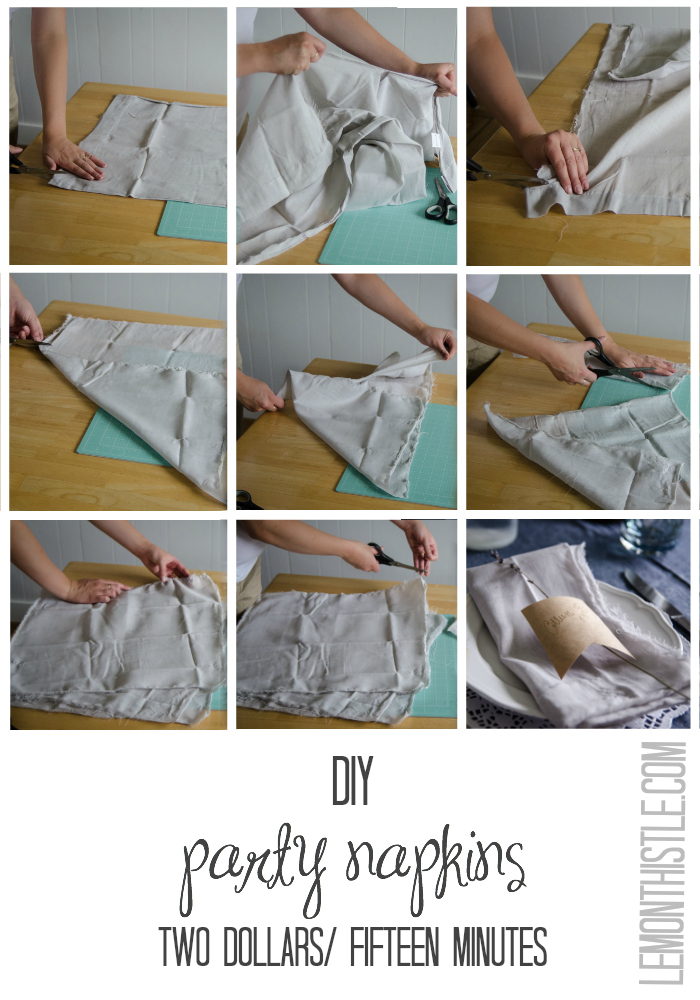
Here’s the play-by-play. The napkins are made out of (dun dun dun) two pillowcases! They came in one pack from the dollar store- I loved the soft grey so I picked them up before I knew what I was going to do with them. I promise I shop places other than the dollar store- but last time was a good haul (what can I say?). I ripped them up into squares to make napkins which goes pretty quick once you get the hang of it. You’ll want to tear off all the seams before you decide the size of your napkins. I just cut past the seams, then tore along the line I’d cut until almost the end. When I hit the end, I cut to avoid pulling all the threads into a big bunch.
You’ll be left with one piece of fabric from each pillowcase. I folded over a corner to mark the edge of my square. Then cut a start and tore them to size. I got four napkins out of the two pillowcases! I loved the look of the raw edges, but you could also hem them or stitch a zigzag around the edge to prevent further fraying. Trim all the long loose threads off (even though I liked the raw edges, I didn’t want long threads hanging off) and use your finger and thumb to pull out the bunches. You know when a shirt snags and you get a pull? There will be lots of those, but if you pinch them and pull towards the edge, they smooth out quite nicely.
That’s seriously all I did! They work great, the material was thick enough that they were actually useful to clean up. I’ve washed them up and have them saved for another gathering. I’m pretty excited to have these in my linen closet- I can’t believe I scored that material from dollar store pillowcases!

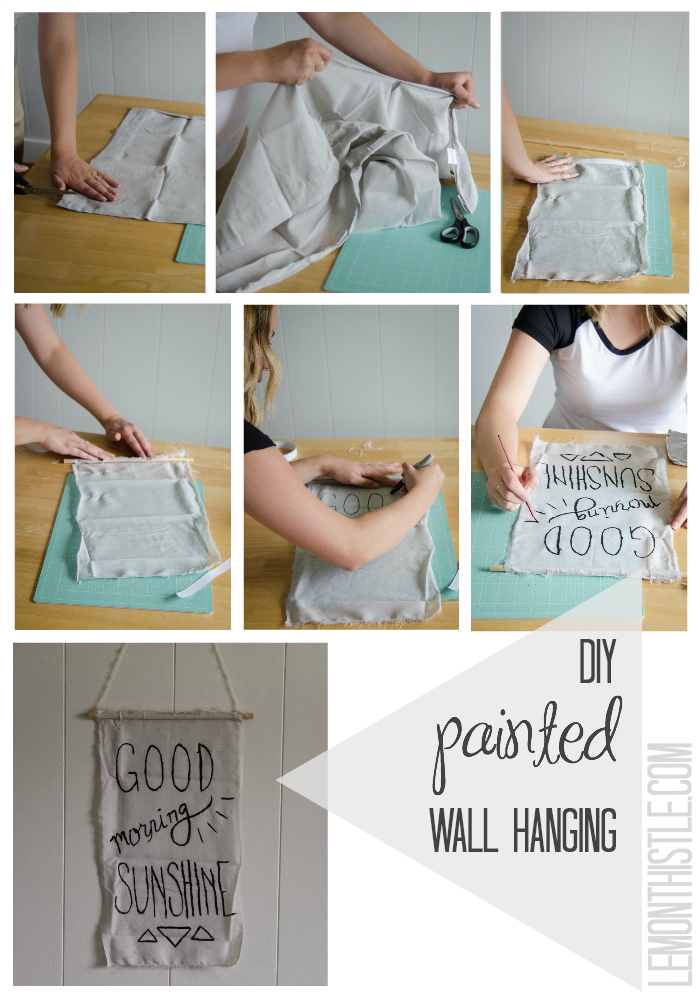
And here’s the wall-hanging (which is still up on my wall by the way- I love it). I was left with some extra fabric from the napkins (by making them square, there was some waste) and decided it would be nice to have something on the wall behind the dining table. I used a dowel, also from the dollar store (there was a pack of 5 for a buck), and double sided tape to affix them. I used some fine yarn to hang it up.
As for the lettering? I lettered in sharpie before painting. I find it so much easier to write or draw with a pen or marker instead of just free hand painting. If I had more time (this was a last minute addition to the party), I could have traced fonts off my computer screen to make it look less DIY. But I like the overall look, even if my handlettering needs some training. (I did a little bit better here and here).
Did you miss my pancake party? It was so much fun, I’d love if you checked it out! Do you shop at the dollar store too, or is it just me?

 Pretty Little Pancake Party
you have such gorgeous handwriting – i thought it was a freezer paper printable ironed onto the fabric. besides, aren’t hand writing fonts trending right now? you get even more natural and use your actual hand writing :)
Aw, Jen! You’re too sweet. I’ve actually never been able to find freezer paper… I don’t even understand what it is! I’m not sure if we just don’t have it in Canada (I’m sure we do) or I’m just missing it (probably).
Cool and thrifty :) Like the idea.
-Tanya
http://tanyaanurag.blogspot.com/
Thanks Tanya! Thrifty is my kind of project :)
How nifty! I’d never think of using a pillow case for napkins, or even to just pick up random pillow cases for projects. I need to step up my creativity! :)
Nifty- I like that word :) I wouldn’t normally get pillowcases but these ones were like- way too nice for the dollar store. I had to.