This post contains affiliate links at at no cost to you! These help support Lemon Thistle- you can find my full disclosure & policies here.

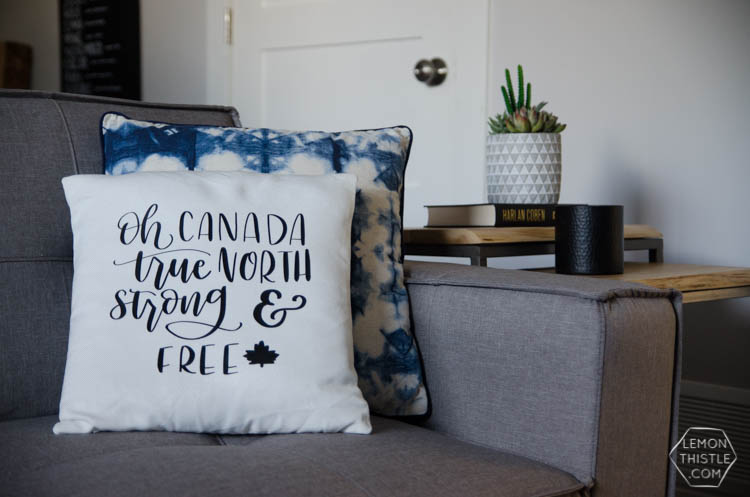
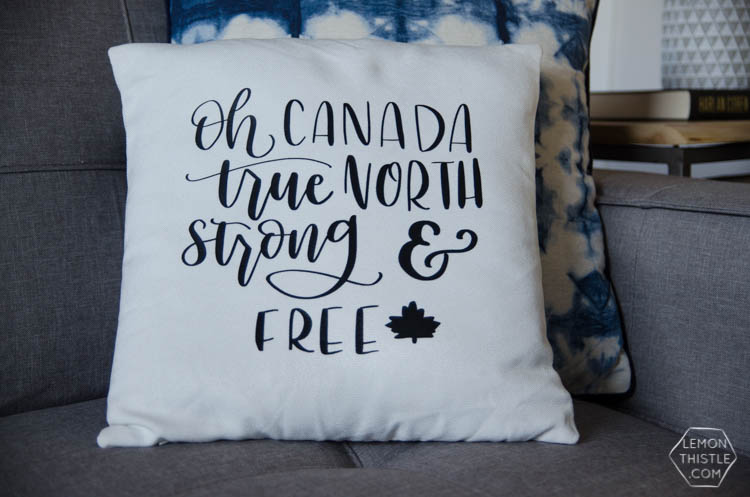
It’s that time of year when ALL the web is flooded by patriotic projects. I see red white and blue from my US friends and my Canadian feed is filled with goodies for Canada and I totally love it. This year is especially Canadian as we’re celebrating Canada 150 (woohoo!). I’ve done a couple Canadian projects already this year but today I’m excited to join a few of my Canadian blog buds to share some inspiration in celebration of Canada 150. And for my project? I’m bringing a DIY handlettered Canadian pillow with the lyrics, ‘Oh Canada… True North Strong & Free’. Which, by the way, I’m totally aware that I skipped some words- but I picked my faves, the ones that represent what I love most about Canada.

This pillow is so simple to make using a Cricut or other cutting machine and heat transfer vinyl. I did the hand lettering for you so all you need to do is grab the free design below. If you don’t have a cutting machine, you can still use the template and print it out using it as a stencil or transfer. To transfer a pencil outline to your pillow case, just color on the back of your print out with pencil, then flip pencil down/design up and trace firmly over the design. You can then use fabric paint to fill in the lines. My all time fave fabric paint is Tulip Soft Matte Black. But if you’re using a Cricut? I’ve got the full step by step below!
Oh, and YES you could totally make it extra-patriotic with red and white!
The first thing you’ll need to do is grab your design. You could totally use your own, but I’ve got mine available as a free download for you if you like. It’s hand lettered by me and cuts really clean. As always, freebies from Lemon Thistle are for personal use only :)


Once you have your design, open up your cutting machine software (Design Space if you’re using a Cricut like me!) and start a new project. Upload an image, select this guy, and make it a cut only file. Insert it and size it to fit your pillow before hitting GO. Make sure you tick off ‘reverse for iron on’ before you make the cut. If you’ve never used iron on vinyl before… it’s the shiny side down (it’s taken me so long to remember that!).

Once it’s cut, weed away the parts you don’t want to transfer and heat up your iron. I use just a thin piece of material between my iron and pillowcase/transfer and touch up any parts that have trouble transferring directly with the iron. Peel away the backing and you’re DONE! Isn’t that simple? Seriously, making things with vinyl is addicting, friends. Just as a warning ;)

If you loved this, you’ll love these other Canada proud projects from my blogging friends. Check them all out below!

 Giant DIY Tassels for a Donut Party
It turned out SO beautifully!!!
I LOVE this DIY! It’s so pretty! Pillow trade anyone?! How good would this look with my maple leaf pillow! lol.
RIGHT!? Haha they are the perfect pair!
Love how this turned out! So cute, Colleen.
I’m such a huge fan of yours! You have such great ideas~