This post contains sponsored or affiliate links which help support Lemon Thistle. As always, I’ll only recommend things I love, love. Full disclosure here.

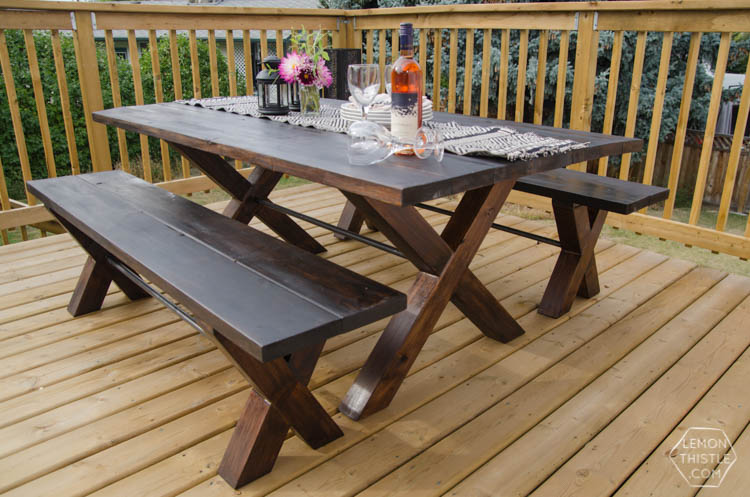
You guys, if you follow me on Instagram you’ll know I’m darn proud of this one. Meet Shane and my first big woodworking/ furniture building project- our new patio table! And it’s sitting on top of our new deck! It’s all so exciting. And we managed to finish before it’s too cool outside to really enjoy it. We actually still have a few deck related things to finish up (like siding the big hole in our exterior! But the that’s not stopping us from enjoying our time on it at our new table. This weekend when we hosted our kiddos second birthday (did you see the fun dino party we threw?) we had the french doors open and the deck was full of family celebrating. It was such a nice change from last year when we were all crammed inside.


Now, let’s talk about this patio table. If you know your way around power tools (we only used 4) then you can certainly pull this off. We took a bunch of plans that we’d spotted online and combined the features we liked into our own ‘plan’. I’m so glad we took the time to be picky about the details and am thrilled with how it all came together. Everything we used was picked up in a trip to Home Depot (and we only had to go back once for one more piece of lumber- we’re getting better at planning), and we made it in our driveway in the evenings after kiddos were asleep. I love the X legs and really wanted to pair that with a trestle- but didn’t love the look of a wood trestle with the X so pipe it was. We were worried it wouldn’t be very stable, but it most definitely is solid.
Here’s what you’ll need to make your own:
- 5 Pieces of 6 foot 2×8 lumber
- 6 Pieces of 6 foot 2×6 lumber
- 1 Piece 10 foot 1×4 lumber
- 4 Pieces of 8 foot 4×4 lumber (we used cedar as that’s what’s in stock)
- 15 Feet of 3/4″ Electrical conduit pipe
- Hammered Black Spraypaint
- 2 1/2″ Wood screws
- 1 1/4″ Wood screws
- Kreg Jig (for making pocket holes)
- Wood Glue
- 7/8″ Spade Bit
- Circular saw (that’s the only saw we used for this, although if you have a chop saw, I’d recommend using it!)
- Drill
- Belt sander and electric palm sander (we used an 80 grit belt and 100 grit for the palm sander, plus one piece of 220 grit for between coats of Polyshades)
- Measuring tape, square, and pencil
- Wood fill (if you choose! Make sure it’s stainable)
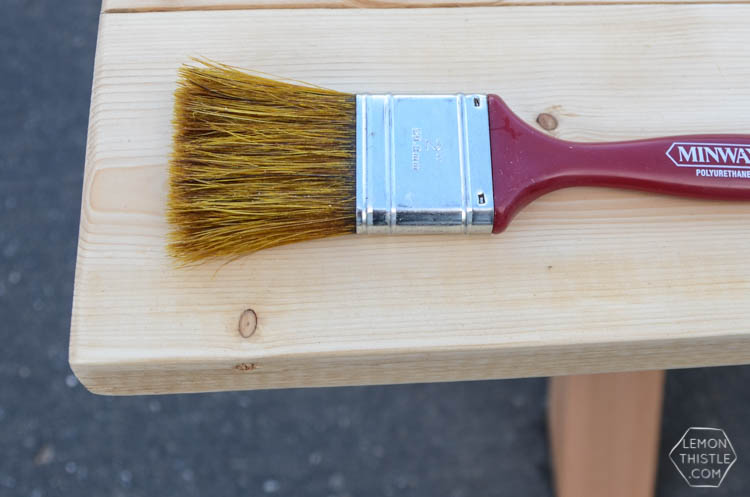
- Stain of your choice (I used Minwax Pre-Stain Conditioner and Minwax Polyshades in Espresso) with poly friendly brush (I again used a Minwax one)

The first thing you’ll need to do is decide how long you would like your table. We chose 6 feet and inset the legs half a foot per side. Cut your table top pieces to length and lay them out as you would join them. Our table top is made up 6 pieces. Use your Kreg Jig to drill pocket holes in the boards that need to be adjoined to one another. This was my first time using a Kreg Jig and I’m so impressed by it! It’s this handy little guide that you line up to drill holes at the perfect angle to join pieces of wood together. We spaced our holes out every 8 inches or so, but I’m sure you could do less. Like I said, this is our first furniture building project so we probably went overboard making sure it wouldn’t fall apart on us! When your pocket holes are drilled, use the suggested screws (2 1/2 inch wood screws) to fasten them together.
Now you have a table top- didn’t that go quickly?! We sure thought so. You could choose to do your benches at the same time or finish your table before turning to your benches. I’m just going to give the instructions for the top once… because after you join the 8 boards for the top together, I’m sure you can do the same for the 2 boards needed for your bench. You’re awesome like that.


Now it’s time to tackle the X legs. I’m going to be honest… these intimidated us. Angles and MATH!? Come on. But the table legs are pretty simple to figure out, it’s the bench legs that are tricky. For the table legs, cut 45 degree angles for the ends, each side measuring 37 1/4″. The X will be joined using lap cuts. For these, use your square to mark out a 3 1/2″ area that starts at 18 9/6″ from the bottom point. This sounds a bit confusing, we figured it out by staring at these plans from The Rogue Engineer for a while. You will be cutting these chunks out with a circular saw. You only want to cut halfway through the 4×4 so set your saw blade to 1 3/4″ before starting plunge cuts. We kept cutting until it was completely cleaned out. The 4×4 pieces will then slot together (maybe with a bit of wiggling) to make a perfect X. Wood glue should be applied in the lap joint. We also put in a few screws at the joint.

Now, the bench X legs are a bit different since they need to be taller than they are wide. We don’t have a protractor to tell you the exact angle so here is how we decided the angles of the cuts. Draw out the width and height of your bench on a scrap piece of board (we used drywall) to make a rectangle. Line one piece of 4×4 up to sit corner to corner and mark the end cuts. Trace around the 4×4 onto the drywall or paper while you’re at it. Then, do the same for the other half of the X. When you remove the 4×4 you will see where the pieces intersect and you need to cut your lap joint. Transfer those marks onto your 4×4 pieces and get to cutting. I hope that makes sense! We’ve scanned in a little drawing for you .

Now that your Xs are assembled, make them nice and sturdy by cutting a piece of 1×4 to attach with screws across the top of each. Now it’s time to get it all assembled. Turn your table top upside down and lay your X legs on top, the outside of each edge measuring 6″ to the table top edge, centred width ways. Measure how far between your legs (if you’re not doing the same length table as us, this will vary). Add 1 1/2″ to this number and cut your pipe to that length. Give it a couple coats of Hammered Black spray paint.

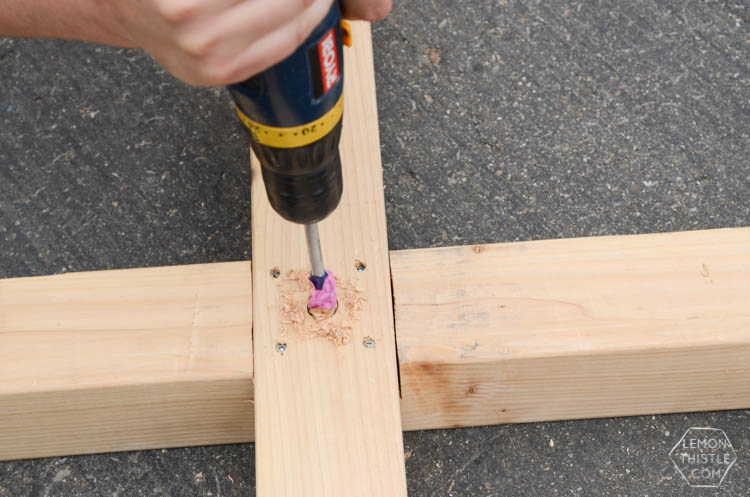
To make your holes for the trestle, take your spade bit and mark 3/4″ from the end (not the very point, the edge that it will drill to size) with tape. Drill your holes 3/4″ deep. The reason you’ll want to use a 7/8″ bit instead of a 3/4″ is because the electrical conduit is measured from the inside, so the actual diameter of the pipe is bigger around the outside. The pipe should slot in with some effort. We applied wood glue into the hole before inserting the pipe. When your legs are attached to each other with the pipe, you can screw the legs to the table top. Do this with your 1 1/4″ screws through your 1×4 pieces.

Then stand it up and be amazed at your beauty! Do the same with your benches and then you’re on to finishing. Having never done a project like this before I was so excited when we got to this point- I didn’t realize how time consuming finishing is! Sanding that sucker… then sanding some more… and more… before even staining! What a process. Plus, since we’re lacking an under cover work area, we had to wait out the rain (of course, when we got to this step it rained every day!) before we could move on.
Before we sanded, we decided we wanted to fill some of the gaps around the lap joints. I’m so glad we did- it made such a clean looking final product! If you do this, make sure to use stainable fill and let it dry completely before sanding.

We started with our belt sander and a 80 grit belt. The belt sander is a magical thing, it’s so darn efficient. We followed that with a 100 grit on our electric palm sander and were really happy with how smooth it was. If you were making this for an interior table and wanted it to be beyond perfect, you could go one step further and do a pass with a finer grit. Wipe it clean before moving on to the next step.

Next we applied Minwax Pre-Stain Conditioner. I used this stuff for the first time on my bath caddy and loved how even it made the stain application. It’s a clear liquid you brush on before applying the stain. The only catch is once applied, you need to let sit for a little bit- but not any longer than 2 hours before applying the stain.

For the stain, we chose to try out Minwax Polyshades (we used Espresso) for the first time. This is basically stain and sealer all in one. I found it a bit more challenging to apply than regular old stain and sealer- but I did like getting to skip the final step of sealing. It’s thicker than stain but still needs to be applied fairly thin with the brush so takes a bit more focus than using a rag to wipe on liquid stain. Since some of our wood was a bit rustic (ahem, knotty) it was challenging to get the thick formula into some of the gaps. But other than that… we really love the way it works compared to traditional stain! We did one coat all over and after letting it dry for 24 hours, decided to do a light sand on the bench and table tops (with 220 grit sandpaper) and applied a second very thin coat to the the top surfaces.


This table measures 72″ long and 40.5″ wide.
Phew! I know that was a long post… so thank you for sticking with me. I’m crazy happy with this table, it just makes me want to entertain. We’re hosting dinner guests out there tomorrow night and Friday night… and probably Saturday night weather permitting! Now if we can just get the siding on the back of the house, we can share full deck photos with you all ;)


So tell me… what do you think!? Do you like the pipe trestle or would you choose to stick with wood? Do you think we’re completely nuts for trying this build on our own? A year ago I would have said you’re right, but we’re loving the endless options that come with a few power tools and some confidence. Now we’re busy planning a dining table (think live edge!)…

 A Modern Dinosaur Party!
It looks great! and I love that color stain you picked!
Thanks so much Havalah! I was nervous going so dark, but wanted it to stand out against the deck. I’m so glad it isn’t black!
Making this now. Can you tell
Me why you said 6 2×6 if you only use 2 for the bench. Also can you explain 18 9/6”. Or is it supposed to be 9/16. Thanks. I have a three board bench and wondered what the x legs might measure at that width.
Hi Ross, this is quite a while ago- it looks like the table top is 6 pieces, you’re correct that the bench is only two :)
Oh my goodness! Colleen, this looks incredible!!! It’s absolutely perfect!!!
Thanks so much Kristi! We’re pretty in love with it right now :)
this table is amazing! I love your photos too…very good tutorial :) And the color is perfect! Thanks for sharing at Monday Funday ox
Thanks so much Robin! We’re definitely proud of the final product :)
This looks great! We have a pile of wood that I’ve been meaning to make a picnic table with. I have the plans and everything- just haven’t done it yet. You’ve inspired me! #twousestuesday
You should definitely do it! It was so worth the effort :)
Looks great! Are you worried about leaving it out in the weather?
We have put an all weather finish on it so it should wear well- I’ll be sure to update if there’s any issues with it over the winter! We’ll probably tarp it for the winter just to give it some sort of protection.
Colleen you guys did an amazing job! I want to make my own dining table but leaving bigger projects until the new year for now. The stain is just perfect. I love big, chunky tables. Well done! :)
Thanks so much Maria! We have a couple big projects we’re rushing to finish up before the weather turns then we’re definitely taking a break until the new year and things with new baby have settled down.
Excited to see what big projects you post :) Such exciting times with a new baby! Hope you’re feeling well. :)
Thanks so much Maria! I feel like they’re all taking me 3x (or more!) longer than I’d planned- so one day I’ll share them ;) I am definitely feeling pretty good, although the countdown is on!
In your very first paragraph of instructions, you wrote “Our table top is made up of Use your Kreg Jig…”
Can you please complete the sentence?? Your table top is made up of what??
I want to make thsi table but need this clarified first.
Thank you.
6 pieces :)
How did you fasten the table top to the 1×4?
Just with screws from below!
I am working on building this table, I was wondering exactly how many 2×6 boards wide were used for the top, I see one sentence says 6 and another says 8 and neither worked out to 40.5 wide.. THANK YOU SO MUCH look forward to building this..