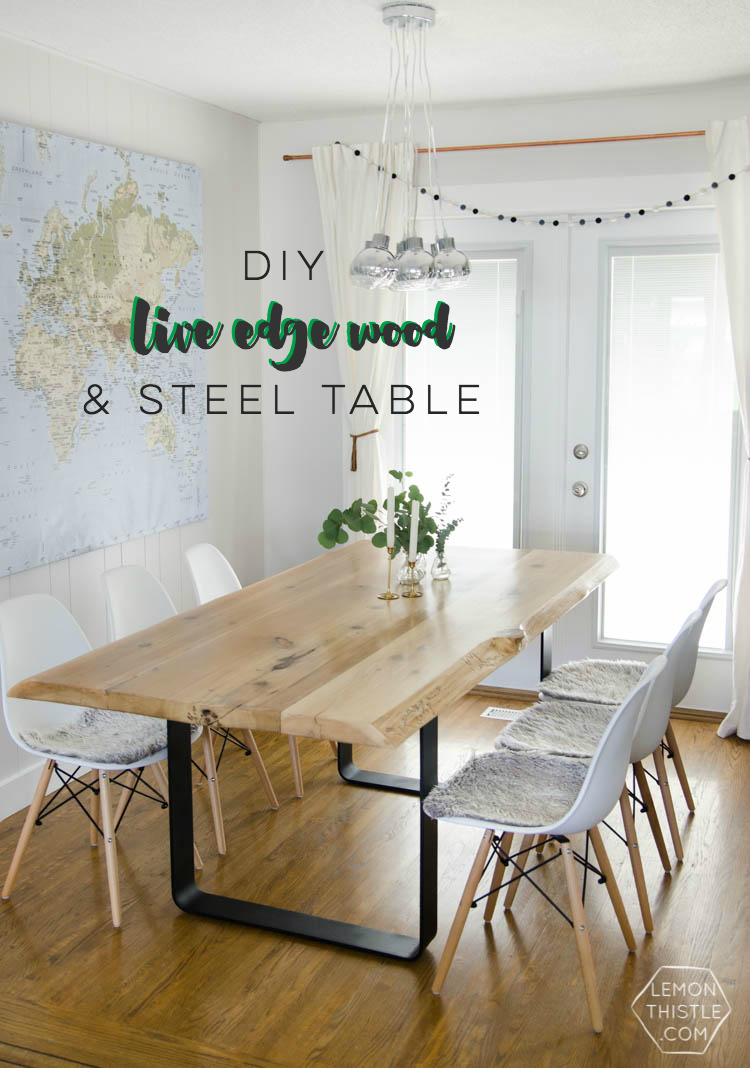
*sigh* I just don’t even want to talk about this one, you guys… I just want to look at it. But I promised the details… so here they go! This DIY live edge table with steel legs is the newest addition to our dining room and our DIY brag book. If you missed it- we shared the whole dining room reveal on Wednesday and it’s my favourite room in the house right now. I want to be in it… or staring at it… all the time. And this table is kind of the star.
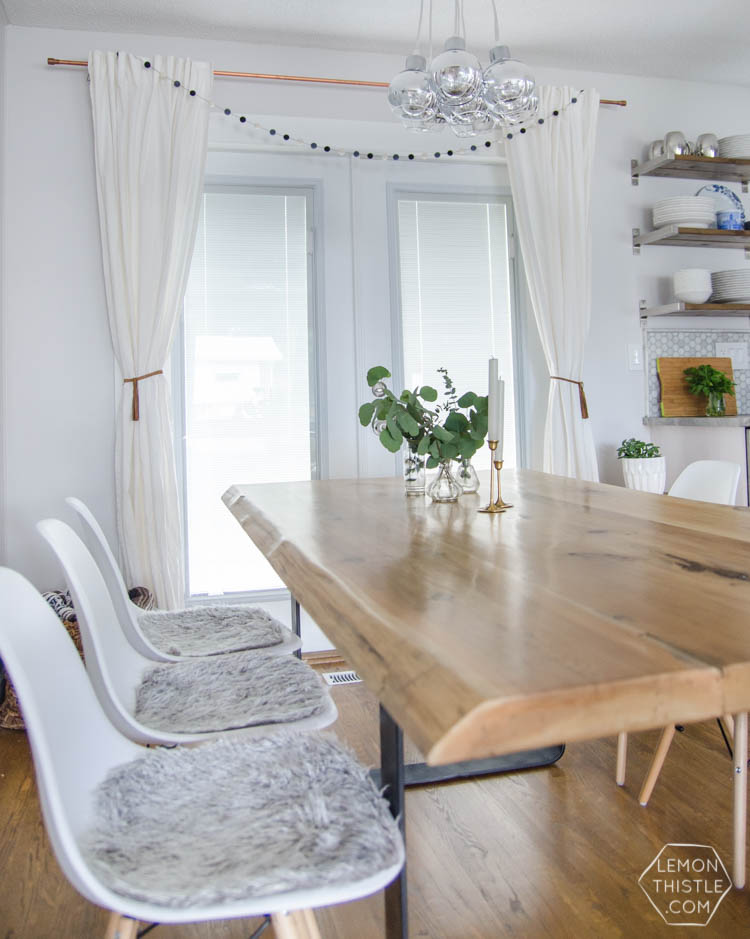
I have always loved the look of a live edge table with steel but the price tag? Notsomuch. I got all confident (before ever having made a table, ever) and bought this live edge wood (3 planks) for a steal at $90 last year, but then let them sit and sit because making a table was intimidating as all get out. So then last fall, we designed and made a patio table out of lumber and were pretty impressed with ourselves, so we got up the courage to start on this one. By building the table in the fall, we had lots of tips we’d take away that we put into this (like no pesky cracks in the table for food to get stuck in!).
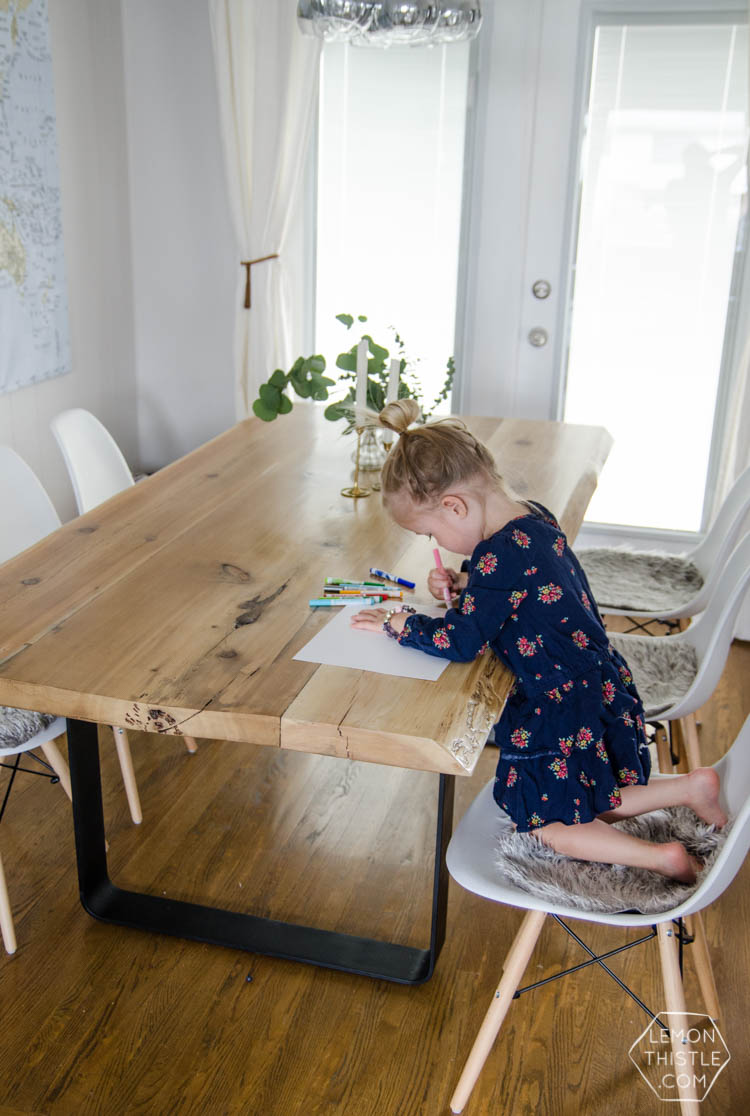
Alright, let’s get down to it. This table is basically two parts- the steel base, and the wooden top. For the base, we sent a sketch and measurements to a steel fabricator Shane works with at work. They did a fab job and it was done in a week (SO quick!). The material is called 4″ flat bar.
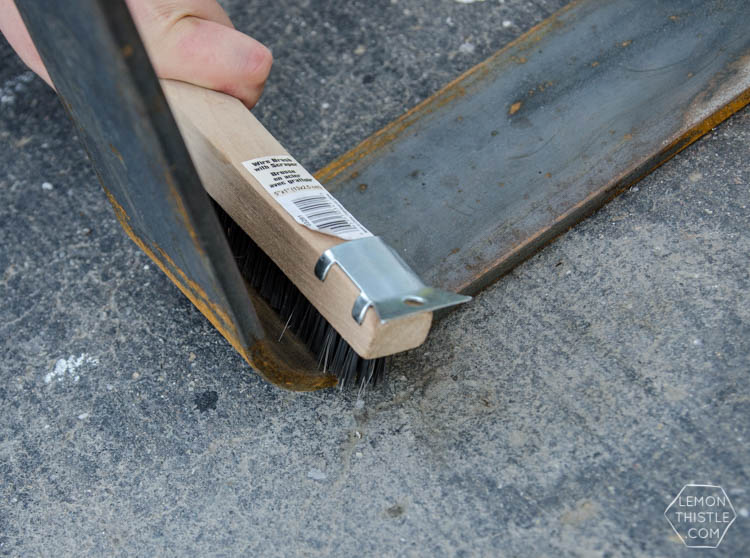
We did some mad wire brushing on it to get all the flakes off and then gave it several light coats of flat black spray paint. We used Rustoleum for this project (this paint and this clear to be exact), just because I was shopping at Home Depot- just read the back and make sure it prevents rust. When that was done, we wiped it clean (flat paint seems to leave a residue that you can wipe off), then sprayed it with clear flat paint to seal it (especially where it would get kicked). Best case would have been powder coating, but we did this to save mula in the first place, so that was out of the question for now. Also- by going directly through a fabricator and NOT a legs company… and by skipping powder coating, we saved a ton.
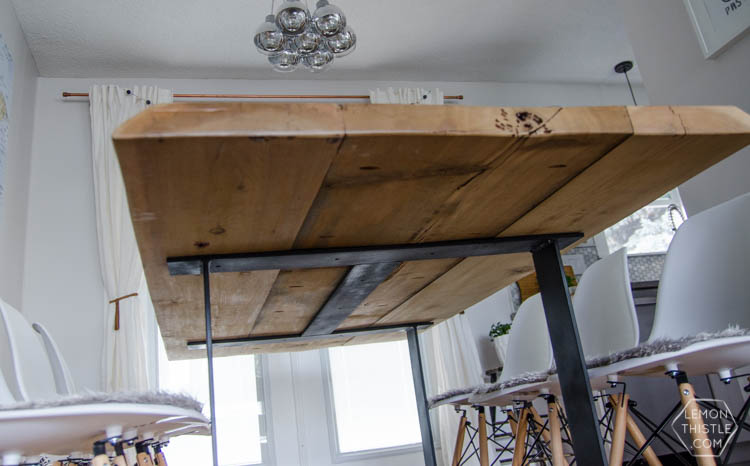
We asked them NOT to drill holes in the base since we wanted to make sure the holes wouldn’t go into the seams of the wood. We used a metal bit (thank you to some mechanic friends) to make our own. Photo is without bolts in yet. To install the bolts, just make sure to do small pilot holes before putting the bolts through. Size your bolts according to the metal bit you use.
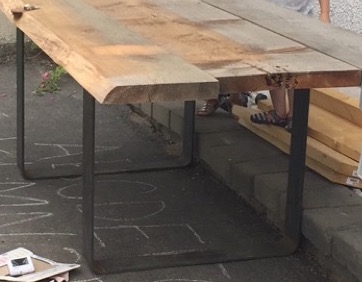
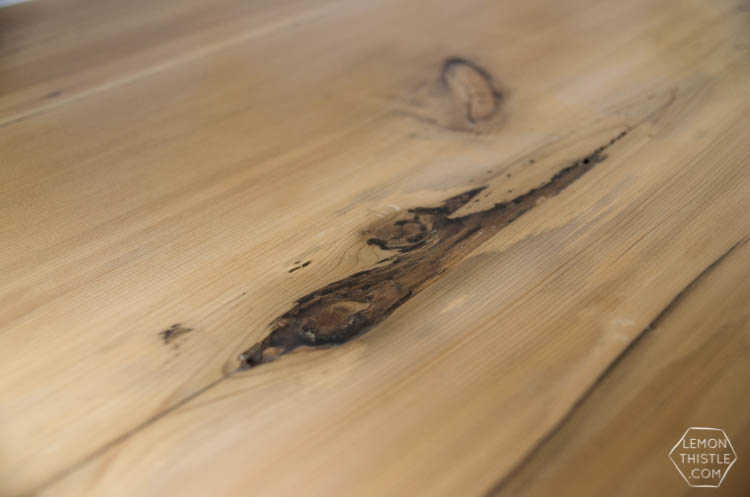
For the top, this was the fun part. I actually didn’t get a good shot of the wood before we started stripping it down! So excuse this zoomed in shot from a distance on my phone. I cropped out my kids with their eyes half open and such. It’s the same cedar we used for our mantle. For this table, we had three pieces of wood, two were live edge, one was straight edge on both sides. We laminated them together by drilling pocket holes with our trusty Kreg Jig (I seriously need to get my hands on some clamps for that thing though), then liberally applied wood glue before screwing together. Best case (again) would have been to clamp it, but we didn’t have the proper tools for that. We used plenty of screws and it’s perfectly solid.
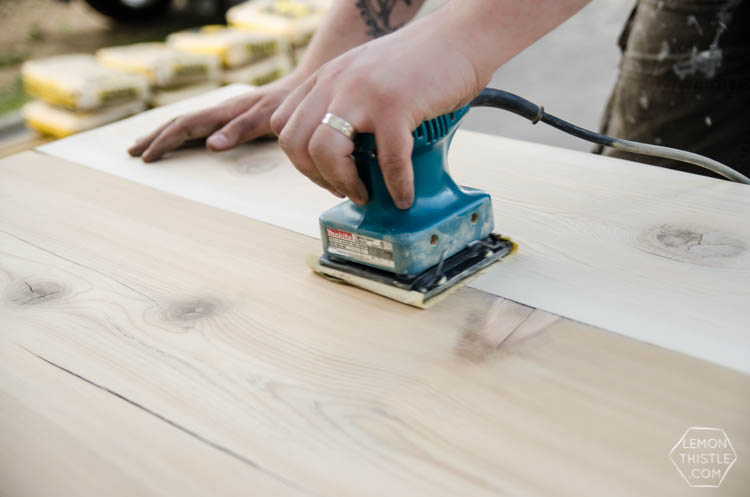
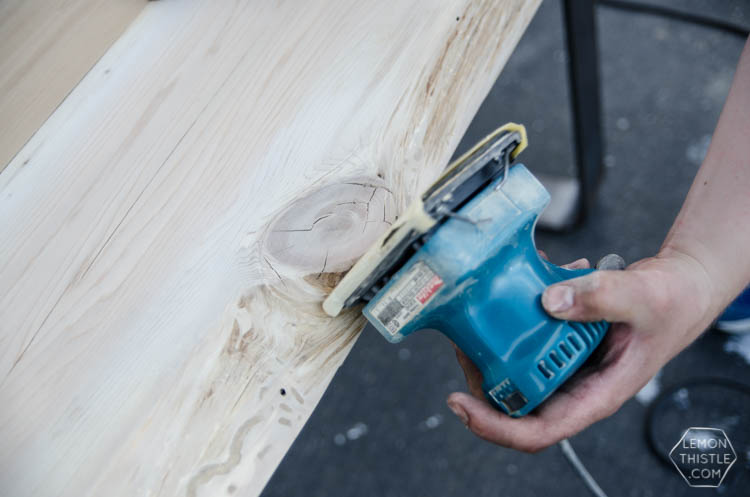
We let it dry for a full 24 hours, then cut the length perfect (we did 6 1/2 feet) before getting to sanding. For sanding, we started with 40 grit paper on a belt sander, working our way up to 180 on a palm sander. We used only the palm sander and sandpaper in hand on the live edge. When it was perfectly sanded, we had some thinking to do about the cracks and gaps.
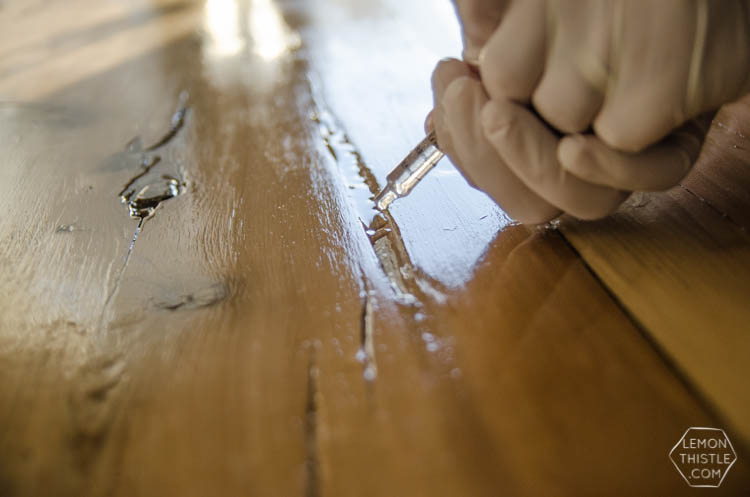
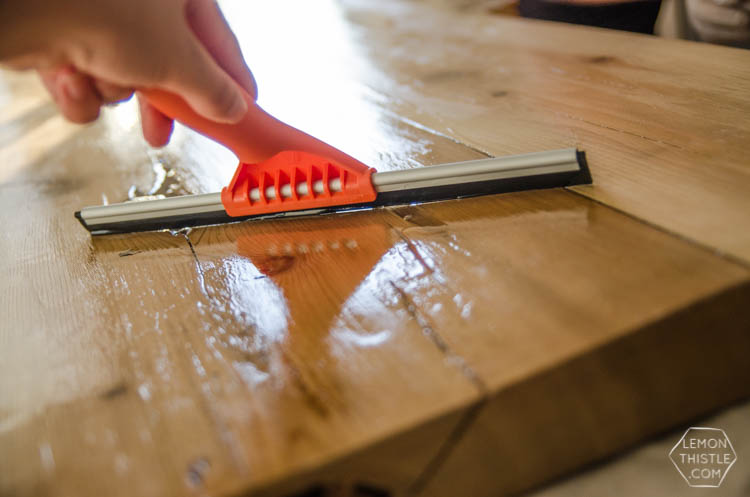
The wood was old, dry, and split. That’s what gives it so much charm- but after having our patio table with slight gaps for food (and playdoh) to get stuck in, we were done scrubbing nooks and crannies on our table daily. Shane did some research online and after tweeting with Rustoleum, we decided we would fill the gaps and knots with epoxy, sand, then do several waterbased clear coats.
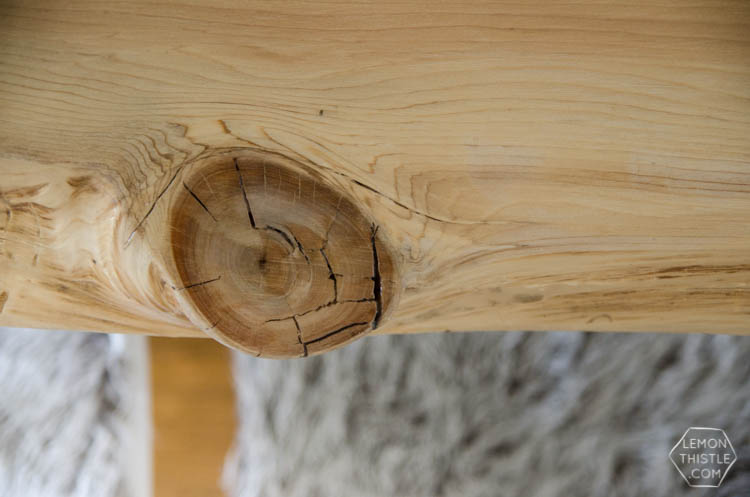
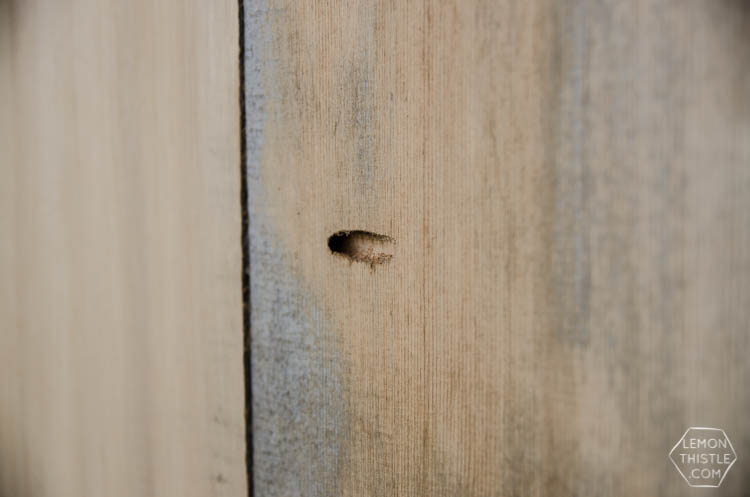
We headed to Home Depot for the third time in the weekend (I don’t even get embarrassed anymore, walking out of there with two screws or one can of spraypaint) and was pointed to Varathane Bar and Table Finish (an epoxy resin that for some reason is not sold on Amazon so here’s the product specs). We mixed that up in small batches to pour into the large gaps and (you’ll laugh) but we used a kids medicine dropper (y’know because you get one with each tylenol packet) to get it into the small cracks. Worked like a charm, friends. We used a squeegee to even it out and pull the excess into the gaps. This took two applications (one each day) and there are still a couple that will keep sucking it up somehow! What is left is very little, it would be hard to get food in there. I want to show you how well this stuff fills. This is a close up of the biggest hole in the table, it’s a big divit around a knot and it was NOT food friendly, but it’s so beautiful. Now, you can run your fingers across that and it’s totally smooth (and totally clear). Total score.
When the epoxy had set, we used a fine grit (220 then 400) sandpaper to clean it up. There were a couple spots we used a paint scraper to pull off drips (oops). This took a while to get it perfectly smooth again, but when we were done- there were no more gaps- just perfect smoothness, so it was definitely worth it! I’ve read epoxy is really difficult to work with and I think it is- but it isn’t if you’re patient and careful with it. But we didn’t flood a whole table top, just filled cracks so in that sense it was forgiving. I would imagine that pouring so much into the holes helped the table gain some strength as well.
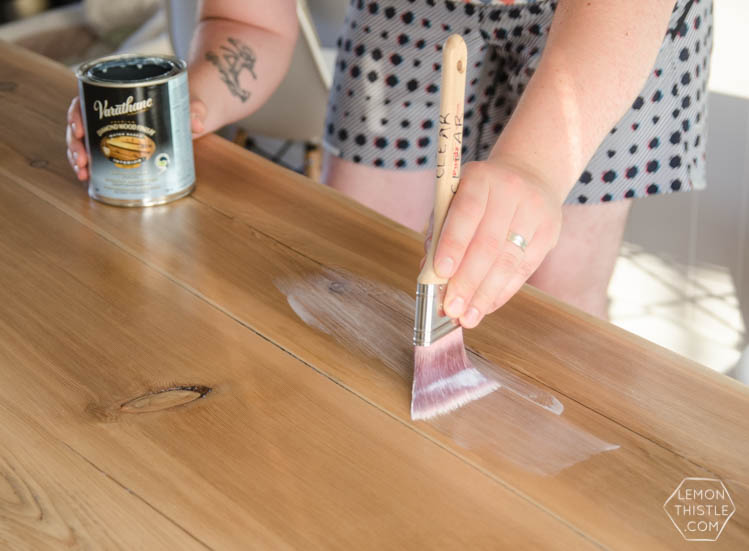
When the epoxy totally dried, we went ahead with our favourite clear coat- Varathane Crystal Clear in Satan. It’s water based which makes clean up easy (yeeesss) and I really like the not as shiny finish that satin gives. We did about 6 coats before taking these photos, but honestly- we plan to do more just because we have kids who like to hit tables with forks.
The last thing to keep in mind is that if you’re using older wood and you don’t have a planer to make sure it’s SUPER level. You’re going to run into the top being a little bit wobbly. We used washers between the base and the top on the few bolts that were a bit loose. We chose to do this over tightening them to flatten the wood since the top is actually level AND we didn’t want to risk cracking those seams we worked so hard to fill!
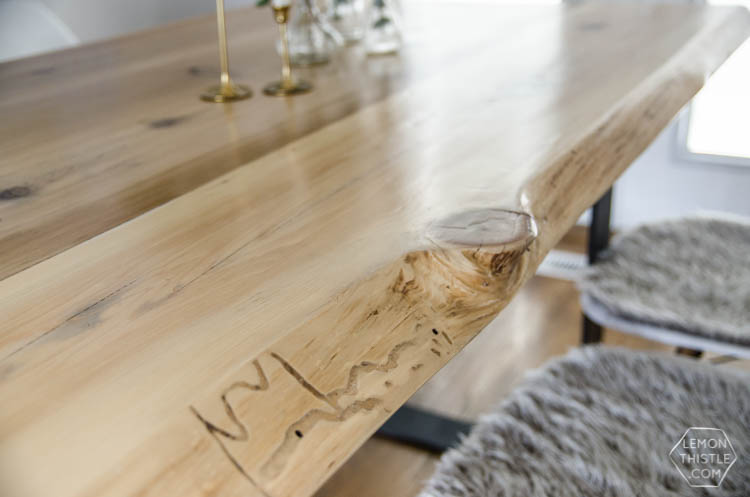
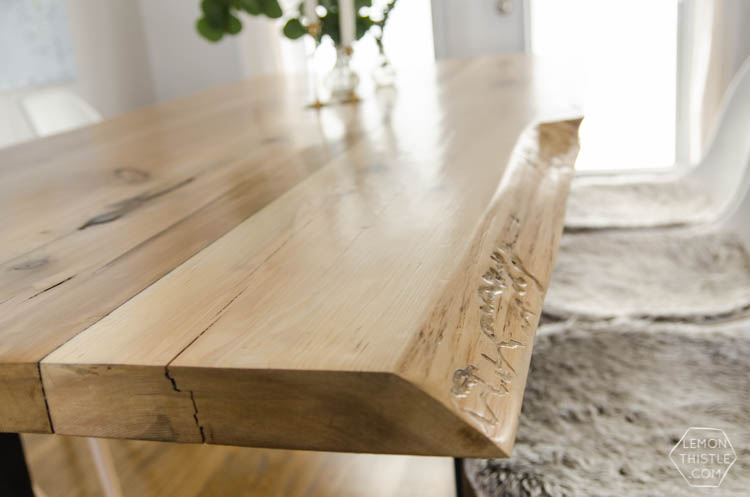
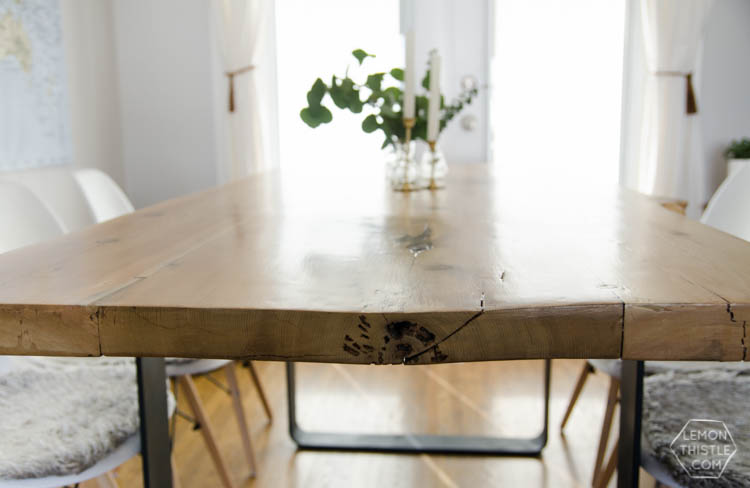
That’s it, that’s all. Oh! And I should tell you that because these legs are not joined at the bottom to each other, it can be a wee wobbly if you push on it lengthwise. But how often do you push on it lengthwise? Shane really wants to attach another piece of steel running on the bottom between the legs, but I’m just not sold. If we did this, you could dance on this table all night long and it wouldn’t budge- but I’m kind of in the camp, I’d rather a pretty table and just not dance on it. I’ll keep you updated if we decide that!
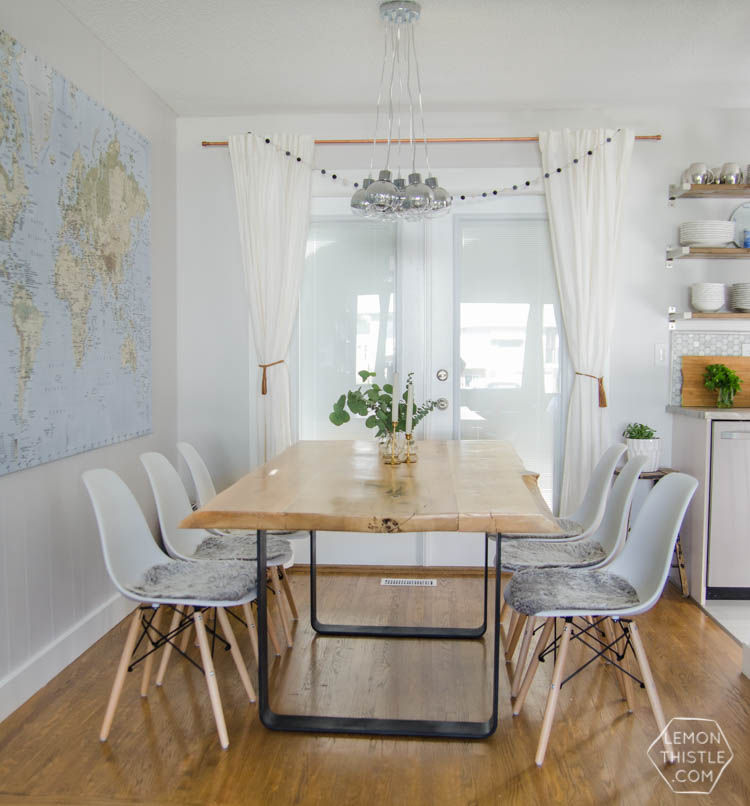
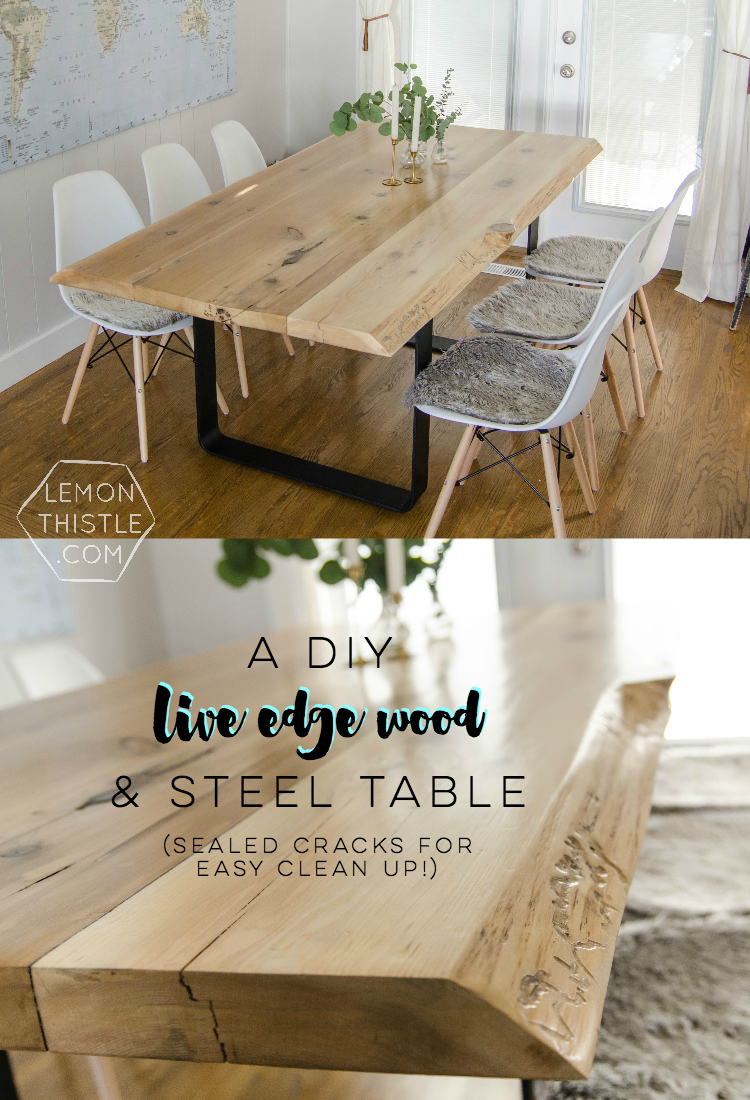
PS. Our live edge table is styled with these AMAAAAZING molded plastic chairs (Henrik Chair) that are from Canadian Tire’s Canvas line (I’m in love, for sure) and the shiny chandelier (Elise Chandelier) is from them too. Are there any other Canadians out there who are excited to finally get some affordable but totally rad decor? Get all the sources from our dining room in the original post here.

 Dining Room Reveal
It’s absolutely incredible!!!
Thank you SO much Kristi!
Beautiful table! We are trying to do the same thing right now and I have a couple questions for the expert if you don’t mind ;)
Did you say you could just scrape the epoxy off? When we tried that the wood would splinter and come off as well (not pretty!). How long did you let it dry before you scraped? Any tricks?
And it would be very appraciated if you could tell how much you (roughly) paid for the legs. They are so beautiful!
Thanks!
Haha ‘Expert’ is a stretch, but let’s give it a go! The epoxy was TRICKY to scrape off. We did it on a hot day outside, I found the sun heated the epoxy to soften it a bit. When it cooled down all of a sudden it didn’t work so well and I did scrape the table a bit. That was chance though. I used a paint scraper.
The table legs ran us $180, plus then we paid for spray paint and sealer (6 cans total). We did decide to have the extra support bar added to the middle of the legs but I don’t know what the bill on that is yet!
I’d love to see when you finish :)
You could also epoxy before the initial sanding, that way you can drizzle it in every little hole, you don’t even have to be that neat about it. When you hit the table with the 40 grit sandpaper, it will sand everything flush. If you sand the table to 320 the epoxy will be as smooth and clear as glass. I’ve done a lot of tables that way, and it works really well.
If you don’t really need that much, you could go with two or three of those 5-minute epoxies that come in two syringes. Make sure to get clear, though!
Thank you for the tips Tony! I can’t wait to try this technique on our next table (my husband has decided he wants to try walnut!)
Hi, your table is beautiful and I think my husband and I could actually do this. I’m back to the epoxy. You just use enough to fill in gaps, knots or splits? Can you sand over the epoxy when it dries or will it scrape the epoxy?
Thanks
Gorgeous! Where on earth did you find three slabs for $80, may I ask?
Isn’t it a steal? There’s a small shop in a rural area near where I live- worth the 40 minute drive for sure! Are you local? I can send you details :)
Beautiful! Also curious about this shop… Would love details please ;)
Hey Kelly, I wish I had more details, it’s just a little shop with canoe bookshelves outside, close to Salmon Arm on the highway
Hi Colleen! I absolutely am in love with this table! I’m looking to go to my local steel fabricator and create a steel base inspired by yours here. Do you have the exact dimensions/drawing that you had to make this? Is there any way I can get a hold of those dimensions?
Thanks so much in advance!!
Thank you SO much Kristine! We actually just sent a really rough sketch to them and they came back with a firm sketch for us. Also- we did add the additional support on the bottom (I need to update this post with photos of that, but you can see it here: http://www.lemonthistle.com/sponsored-neutral-autumn-tablescape-friendsgiving/). I ran up and measured and the base specifically is 26 high / 44 long / 29 wide.
I like your design on the legs. I was going to ask how rigid/sturdy they were – I suppose that support you added at the bottom helped? Does the table sway/rack at all if you were to lean against it on the long side?
Thanks!
Hi, Nope – she’s really happy with it, and it’s stable :)
This is gorgeous! Nice work Colleen! This is definitely a project pinned for when I move out of my apartment. :)
Thanks so much Brittany! It’s a beast to move… good idea to save it ;)
Love this table! How did you cut the one flat edge on your outside live edge pieces to make it straight to match your inside piece??
Thanks for the post love it!
Hi Jenn,
We had this done at the shop we bought the lumber from! A table saw would be perfect although you could hack it with a skill saw as well (we’ve done it, it’s not perfect but it’s ‘good enough’… I’ll be sharing that for a desk I made this saturday). Let me know if you have any other Qs!
Love the DIY!!! I’m totally thinking of doing the epoxy fill on mine as well. May I ask, where are the chairs from?
Thanks so much Pooja! The Epoxy fill is really what makes the table :) The chairs are from Canadian Tire (Henrik from the Canvas line)
Hi! We have very similar chairs and would love to know where you made/ got the chair pads from? Such a cute idea and can’t seem to find any that don’t cost an arm and leg! Thanks (:
Hi Stephanie,
They’re actually just faux fur from the fabric store cut to size! If I were to make them again, I would add a backing to make them a bit stiffer and keep them from sliding around so much OR just use real fur… but the appeal of faux to toss in the wash is great too.
Hi, my wife and I love your table and are planning on trying to make one for our new house. What type of wood did you use? We have 3 daughters so we need something that will survive children and eating! How thick were the slabs? What was the name of the stain you used? Thank you so much!
Hi Graeme,
The type of wood we used is cedar which is beautiful but it’s much softer than I remember! I would either choose a harder wood or do as many clear coats as you can muster OR do the bartop epoxy (thinly) then top it with the satin finish clear coat. Just because with kids… I’m sure our kids aren’t the only ones who smash forks into the table and the 6 or so coats we did wasn’t quite enough. That said… if you don’t mind a worn look then let them beat it up and it gets more worn and lovely.
We didn’t use a stain- just a clear coat on these. The wood was about 2″ thick but they’re honestly not cut standard size :)
Sorry one more question….what is the length and width of your table? Can you fit 3 chairs comfortably on either side? Thank you again.
The table is just under 6′ long and 3.5′ wide. We can absolutely fit three on either side comfortably and 1 adult-2 kids on each end. BUT our base doesn’t work well with our chairs. We I would measure your chairs to make sure you can either fit two in between the legs or have the legs small enough that you can push chairs all the way in right in front of them. Before we got these chairs we were working with a bench which fit great though :)
Love you table! I have a similar table that I tried to coating. I tried to use your favorite clear coating but it can be peeled off.
How long did you let it to be completed dry? And did you sand it between coating?
We haven’t had any issue with it peeling! We have definitely still dented the table (kids and forks, y’know) so it doesn’t make it rock solid but no peeling here. We waited about 6 hours I’d say? But we also did it in the heat of summer so things dried nice and quickly. You could try an epoxy barcoat if you want something super durable!
Hi again, what stage did you do the epoxy? Did you put the epoxy on raw wood or did you varathane it with a couple coats first? Thank you!
Hi Graeme, yes we did the epoxy on the raw wood and varathaned over (to even out the finish)
Hi there,just letting you know that this project you did is amazing a very wonderful piece. I’m trying to do this same exact project hope it all comes up ok. Very beautiful!!
Hope it goes well! I’d love to see a photo of the finished product!
Your table is absolutely beautiful! I’m in the process of building my own faux live edge patio table from 2×12 lumber now. I’m trying to avoid having to rip the edges so there are a few tiny gaps in a few places between planks after clamping and joining with pocket holes. Were you able to fill gaps successfully between planks with the epoxy or did you just use it for cracks and knots on the wood itself? Thanks!
We didn’t have any gaps between the wood pieces in this one! If it’s for a patio- I would just leave the gaps (you can see mine here: https://www.lemonthistle.com/diy-x-leg-patio-table-with-pipe-trestle/) BECAUSE it will help drain the rain through and make cleaning it easy. But I totally understand if you’d rather have it look like one slab! Just make sure you put painters tape or something similar on the bottom of the cracks so you don’t just pour epoxy through.
Colleen,
Beautiful build! I was recently asked to build a similar table for a friend using stainless steel legs. Can you give me some advice as to how to determine how far the legs should be apart and how close to the edge the top flat part that screws into the wood should be? This table will be closer to 84″ long and 35.5″ wide. We are using 2×8 pine for the top.
Thanks Colleen!!
GREAT question. That’s actually the one thing that we regret… We measured to fit a chair on either end comfortably and that worked great except our chairs are a bit wider than our past ones and we didn’t take into account being able to push them all the way in with two between the legs on either side. I would measure according to the chairs you want if you have that luxury!
How thick is flat bar u used for legs….guessing 5/16 or 3/8. Would you have gone thicker? Or good with what u got?
It’s 3/8″ and we’re finding this is tooootally sufficient for the table :)
Thank you so much for this article. My husband & I sell live edge slabs for a living, and we 100% support the Do-It-Yourself projects at a cheaper price. I just love your table, and you took great pictures too.
Thanks so much Jena! What a fun business to be in! I bet you have some gorgeous pieces
Really² awesome!!! I love this table…
Thank you so much Zaidi!
Hi Colleen! I was completely inspired by your table and we are now making one of our own. Can you tell me the height and width of the legs along with the length and width of the table top?
Thank you!!
Hey there! the flatbar is 4″ wide and the legs are just standard table height. I think our table is just over 6′ long
Looks great for a DIY! For the next table you may want to bring the legs of the base out a little bit (toward the ends) to help with base leg obstructions when seated at the table. Looks great! Keep up the great work!
We’ve definitely thought about it but wanted to have room to sit on the ends as well!
Wow Colleen!! The table is beautiful!! Do you know what kind of wood you used? The clear finish sure brings out so much beauty!
Thanks Christine! It’s cedar, so it is softer, but the colour is so beautiful :)
What type and size of screws did you use
Hi Brady, I honestly can’t remember it’s been so long now!
Just an fyi to anybody who loves those chairs as much as I do, they now sell them at structube for 39 dollars each. The originals were 100 each!!
Great deal! Structube doesn’t ship here… I’m waiting for themt o change that! XO
This table is absolutely beautiful! Well done :)
My husband and I are in the process of getting wood to start our own project similar to this, so very much appreciate the detailed post on the process! I have one (maybe silly) question: for the Varathane clear coat, did you cover just the top and live edges? Or also the ends of the table? Am I right in assuming it’s not needed for the bottom at all? Thanks in advance!
I did just do the top, live edge and the ends! The ends soak up a lot. Since I didn’t leave the wood inside for a year (or something like that) I didn’t coat the bottom so the wood could breathe as it dries out :)
Hi!
Your table is absolutely beautiful! I think I’m going to attempt this project myself this spring.
One question, what instructions did you give the mill to ensure that your pieces all fit together? Did all three pieces come from one longer slab or a trunk? I’m curious about what I should ask for. Thanks!!
Hi Julia, I just told him what I was making and he cut them to size with me there :) I’m not sure if they were all the same piece, I think the two edge ones were but the center wasnt.
Hi there!! This is beautiful! I would love to try to make something like this but I’m honestly a little intimidated!lol did you use kiln dried slabs?
Hey girl! We totally didn’t! We got them from a little shop on the side of the highway- where they were stored outside! Ha! I know kiln dried would have been better but this has been fabulous for our family!
What type of cedar did you use for this table? We have some red cedar furniture and it looks way different than the table.
I’m not sure what kind of cedar it is! We bought it from a small shop on the side of the highway. Ha! Sorry that’s no help :)
Awesome table! Where did you get the chairs and cushions? Found something similar at IKEA but not quite the same. Thanks!
Chairs are from Canadian Tire! The cushions are actually just faux fur :)
The chairs are from Canadian Tire and the ‘cushions’ are just faux fur that i cut to size!
This is exactly what we’re doing. However, we want to stain our wood. Would you recommend doing this before sealing the cracks with epoxy?
YES! Definitely stain before epoxy as the stain won’t penetrate where epoxy touches :)
Hi! LOVE your table. We’re doing something similar and I hoped to confirm the order of your steps – is this correct?
1) sand table
2) fill holes/cracks with epoxy*
3) sand any epoxy that went past the holes
4) cover with satin varnish
*did you only fill the holes with the epoxy and clean it up by sanding it down after? Or cover the entire table?
Thank you in advance!!
That’s what we did, yep! We only filled the holes but if you’d like it to be more dent resistant, you could do the whole thing :)
Love this!!! Could you explain a bit more about how you attached the legs to the top? Thanks.
Just with bolts from the underside!
This room is absolutely beautiful! I realize I’m a tad late to the party, but I’m redoing my entire house (4 houses technically, the 1850 farmhouse has had 3 add-ons). I was wondering if you happen to remember the name of the paint color you used on the walls? Thank you!
Hi Dani! It was a custom colour, the closest match we’ve found is called Dreaming in the Clouds by Para Paints