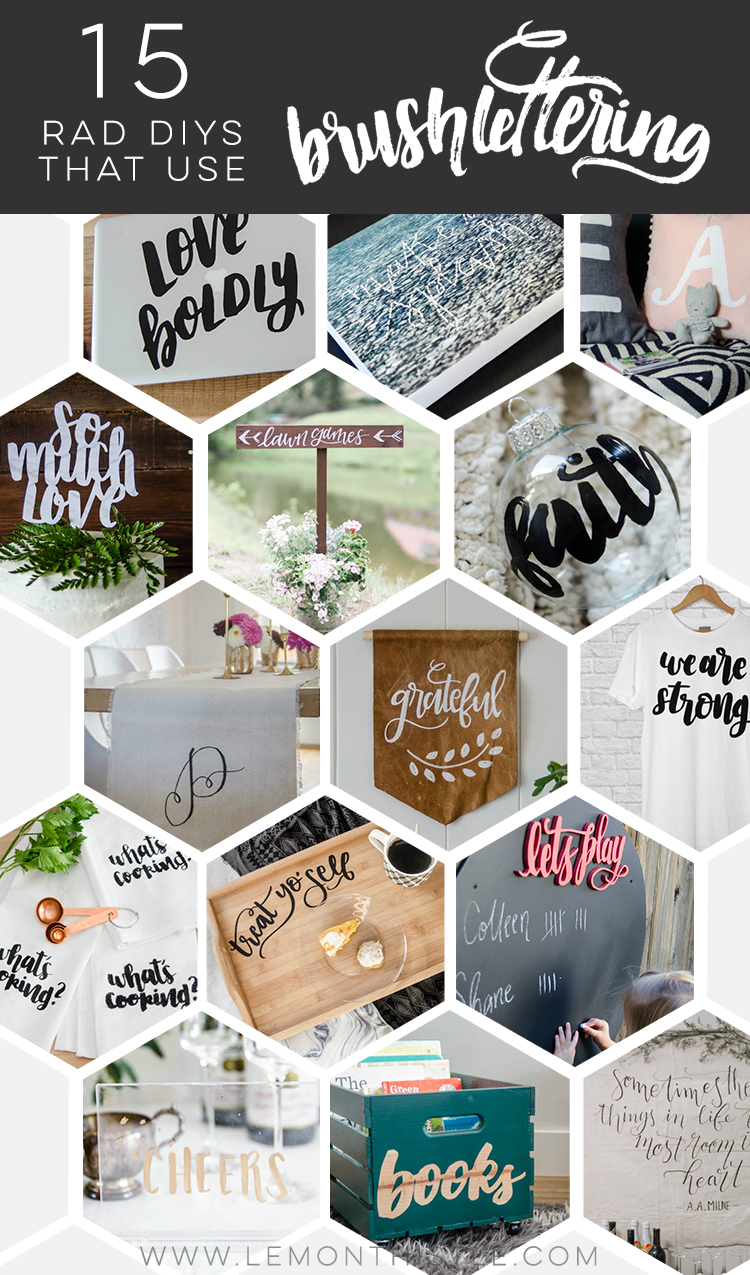
I can’t believe I’ve never done this round up! I’ve been doing more and more DIYs that incorporate hand lettering on Lemon Thistle (and most of the time I include a free template if you’re not artsy), and am loving the collection I’m beginning to see in my home. I have SO many more in mind that I actually have to sit down with my calendar and space them out so I’m not bombarding you with only brush lettering DIYs… because we have renovations and printables and table builds to share with you too. But my heart? It says LETTERING.
So without further to do… here’s the 15 projects. BTW… I left out any lettering on paper or even on chalkboards. I’m looking at total DIY, transferring lettering to other surfaces.

Left to right, top to bottom:
ONE: If you learn how to digitize your lettering for a cutting machine like a Cricut… you can decal ALL the things! This laptop decal is one of more than 100 we made at a girls conference earlier this fall- I did the digitizing, 13-19 year old girls did the rest. If they can do it… you can too ;)
TWO: Stitching! I have never cross stitched before- so I thought it was a good idea to fake it on canvas. It was a giant pain in the fingers (I’m sure it would have been a different story if I’d stitched before!), but the result is SO cool. I love the effect.
THREE: Let’s just go ahead and assume I treat lettering like hot sauce. I put that *#$% on everything. Like throw pillows. I used stripflock (that sweet fuzzy stuff) heat transfer vinyl for this monogram pillow for my daughter. Throw pillows are pretty much asking for lettering. I think I’ll have to do some more soon!
FOUR: So much love! For this cake topper. I used brush lettering and created a marble effect cake topper for a wedding. This baby is REALLY easy and cost nothing compared to custom laser cut toppers! If you can letter your own phrase, you could make it say ANYTHING you want. ‘Party like it’s 99’? Sure, if that’s your thing.
FIVE: Another wedding project? You know it! Lettering and weddings go hand in hand, kind of like two other people there. I love doing custom wedding signage and this is one of the signs I lettered this summer. I’ve got a tutorial in the works to share my favourite tools to letter on wood- for the cleanest lines and the quickest lettering.
SIX: Well, the holidays are coming so even though this isn’t a holiday post… this is one of my favourite gifts ideas I’ve used in the past few years. Hand lettered glass ornaments! My favourites that I made are white ornaments with black lettering, but gold lettering was pretty dreamy too. Lettering on a curve can be a bit of a challenge but I was actually surprised how smoothly it went once I got the hang of it!
SEVEN: I shared this DIY over at my friend Ashton’s wedding blog. It’s SO simple and made of drop cloth. fancy pants table runner for a few dollars? Yep, thank you brush lettering for that one.
EIGHT: I am totally in love with this leather pennant! It’s one of my most recent projects and I’m still feeling like I need to show everyone that walks into my house. But I’m a total sucker for leather, so maybe that’s me. Since I handlettered it and didn’t trace a template on- this baby was done start to finish in less than 10 minutes.
NINE: Okay, I cheated on this one. Because it’s actually for sale now. You can buy it (and support some great causes!) RIGHT HERE and use the code DTG1 to get it for $16.95 and free ship. But hear me out, you can totally make your own! Heat transfer vinyl, fabric paint… it’s an amazing thing. See # for all the tops on how to transfer designs to fabric. I never would have guessed I would be getting to put a lettering design on a shirt like this- who knows where your lettering will end up!
TEN: Tea towels! Is there a more ready-to-customize household item? I don’t know! In this post I shared three ways to transfer a design to a tea towel and went over the pros and cons of each. This is another awesome holiday gift idea. One for each of your neighbours along with a bottle of wine. #done
ELEVEN: Treat yo’ Self with this breakfast tray! This one was such an easy win! I whipped it up in a naptime and it makes me smile each time I pull it out. It’s a vinyl transfer I made with my lettering so I can pull it off if I ever get sick of that saying.
TWELVE: Let’s play! With a scroll saw, why don’t we? This is one of my favourite tools to play with- I love that with a little patience and sawdust you can transform a piece of plywood into a handlettered cut out. Think of all the possibility!
THIRTEEN: Cheers! Gilding acrylic is such a beautiful way to add some classy, classy signage to a party table or wedding. And it’s easy as all get out if you’re handy with a brush.
FOURTEEN: This DIY book crate is such a fun addition to our kiddos room. The reverse paint stencil showing the natural wood in the lettering is such a fun application as well. When you learn how to transfer your lettering and turn them into pretty much anything.
FIFTEEN: Go big or go home! This canvas drop cloth wall hanging is giant! I made it for a backdrop at a baby shower and it’s now hung in a sweet baby’s bedroom. I’m considering making one for the holidays because I really love the concept and can you imagine silver bells that big? Put it on the to-do.
BONUS! Tattoos! Okay, seriously. It just didn’t fit in a DIY with hand lettering post BUT I couldn’t leave it out either. If you follow in Instagram, you might have noticed my lettering’s been made into two tattoos this year and that’s pretty darn amazing. I’m such a tattoo fan (I have a couple of my own) and my next is for sure going to be something I letter. What a special way to make something permanent so personal.

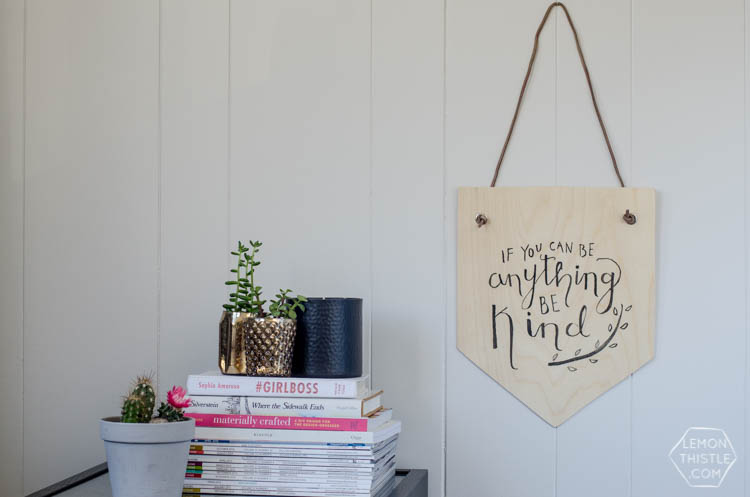
Okay, and I somehow missed this guy. So I had to give him honorable mention. This is one of my first DIY projects to incorporate handlettering. It was also my first project to feature unfinished wood- something I’ve totally fallen in love with.
SO I’m going to go ahead and leave it there. That’s a LOT of projects, I know! And I really love them all. I just can’t get enough of how versatile lettering is for events, home decor, and custom gifts. You’ll never get bored or be ‘done’ if you keep challenging yourself to try something new! I am SO excited to be creating a whole bonus module on lettering in DIY- on surfaces, transferring, and even a mini tutorial on digitizing. I would love for you to learn to brush letter with me and get to making some rad DIYs. Nothing would make me more happy! If you haven’t heard about the course yet, you can get the details RIGHT HERE at the pre-sale discounted rate.

 DIY Burned Leather Keychains
I really want to learn how to write like this!!!
It’s the best hobby! If you’d like to learn- I’d love to have you in my online class. We’ll be starting Thursday! http://lemonthistle.com/learn-brush